Tag: Cleaning Tips

  • How to Get Rid of Ants in the Kitchen: An Expert’s 5-Step Guide

    How to Get Rid of Ants in the Kitchen: An Expert’s 5-Step Guide

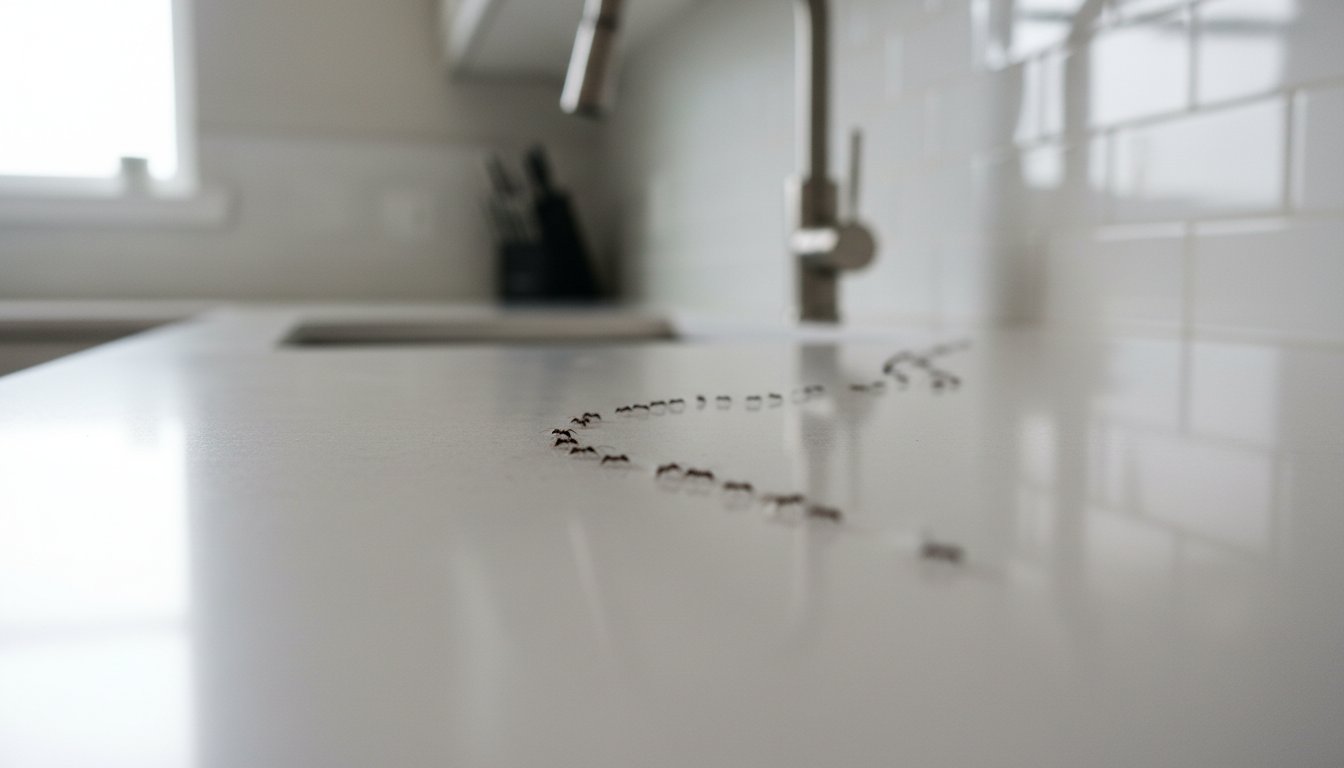
    It starts with one scout. Before you know it, a determined line of ants is marching across your countertop, turning your clean kitchen into their personal buffet. That feeling of frustration-and disgust-is something no homeowner should tolerate. You’ve wiped, you’ve sprayed, but they just keep coming back, leaving you worried about using harsh chemicals around your family and pets. The good news is that you don’t have to live with these unwanted invaders. Learning how to get rid of ants in the kitchen for good is about having a proven strategy, not just reacting to the problem.

    In this expert guide, we are handing you our professional, 5-step battle plan to eliminate your ant problem. We’ll show you how to identify their entry points, use powerful yet family-safe DIY methods to eradicate the entire colony, and implement simple strategies to safeguard your home against future invasions. It’s time to take back your kitchen with a clear, actionable plan that delivers fast, reliable results.

    Key Takeaways

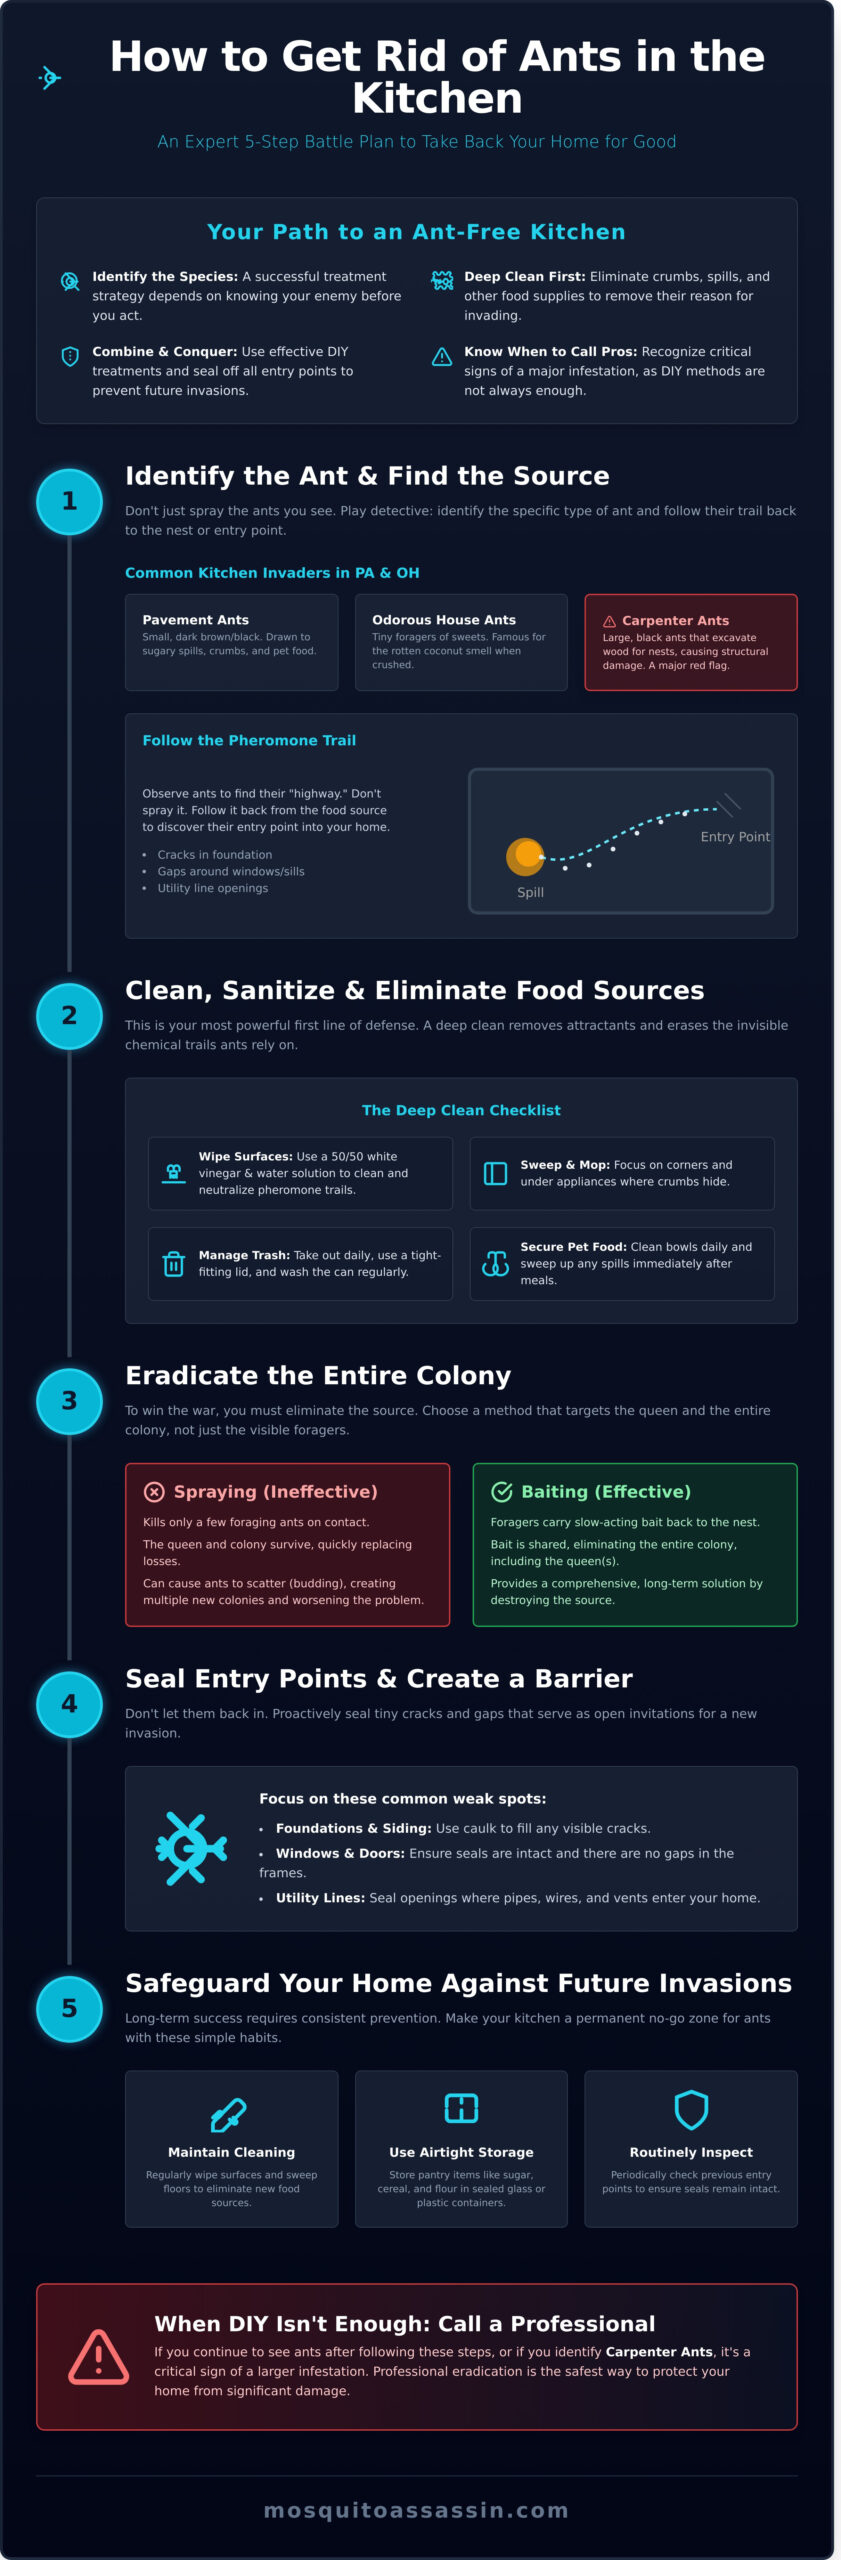
    • Before you act, identify the specific ant species in your home; a successful treatment strategy depends on knowing your enemy.

    • Your first line of defense is a deep clean. Eliminating crumbs and spills removes the ants’ food supply and disrupts their chemical trails.

    • A comprehensive plan for how to get rid of ants in the kitchen combines effective DIY treatments with sealing off entry points to prevent future invasions.

    • Learn to recognize the critical signs of a major infestation so you know when DIY methods are not enough and it’s time to call for professional eradication.

    Table of Contents

    Step 1: Identify the Ant and Find the Source

    Before you grab the first can of bug spray you see, stop. The first and most critical step in any effective pest eradication plan is to know your enemy. Different ant species respond to different baits and require unique strategies for complete elimination. Simply spraying the ants you see is a temporary fix that fails to address the colony, which is the true source of your problem. A professional approach always begins with proper identification.

    Common Kitchen Ants in PA and OH

    As your local pest control experts in Pennsylvania and Ohio, we most often see three types of ants invading kitchens. Knowing which one you’re dealing with is key to understanding how to get rid of ants in the kitchen for good.

    • Pavement Ants: These small, dark brown or black ants are a common nuisance. They are typically drawn to sugary spills, crumbs, and pet food left on the floor.

    • Odorous House Ants: Famous for the rotten coconut or blue cheese smell they emit when crushed, these tiny ants are relentless foragers of sweets and proteins.

    • Carpenter Ants: The most concerning of the three. These large, black ants don’t eat wood, but they excavate it to build their nests, which can lead to serious structural damage over time. Seeing carpenter ants is a major red flag that requires immediate attention.

    How to Follow the Pheromone Trail

    Ants leave behind an invisible chemical trail called a pheromone trail for others in the colony to follow to a food source. Your mission is to play detective and use this trail against them. Instead of spraying the line of ants, observe them during their peak activity times-often early morning or at dusk. Follow the consistent "highway" of ants back from the food source (like a sticky spot on the counter) to discover where they are entering your home.

    Tracing this trail will lead you directly to the source of the invasion. Look for entry points in common weak spots: tiny cracks in the foundation, gaps around window and door sills, or openings where utility lines and pipes enter your home. Once you’ve identified the ant and found their entry point, you can choose from various Pest control methods to eliminate the colony at its source, not just the foragers in your kitchen.

    Step 2: Clean, Sanitize, and Eliminate Food Sources

    Before you deploy any baits or traps, your most powerful weapon against an ant invasion is a deep, methodical clean. Ants enter your home for one reason: to find food and water. By systematically removing their resources, you not only make your kitchen less attractive but also disrupt the chemical signals they rely on. When a scout ant finds a crumb, it lays down a pheromone trail-an invisible chemical road map-for the rest of the colony to follow. A proper cleaning eliminates both the food and the map, which is a core principle of professional Integrated Pest Management for ants. This is the foundational step for how to get rid of ants in the kitchen for good.

    The Deep Clean Checklist

    To effectively safeguard your kitchen, you must be more thorough than the ants are. Focus your efforts on these critical and often-missed areas to remove every potential attractant. This isn’t just a quick wipe-down; it’s a strategic operation.

    • Wipe Down All Surfaces: Use a 50/50 solution of white vinegar and water to clean countertops, backsplashes, and cabinet faces. The vinegar helps neutralize and erase the ants’ pheromone trails, preventing reinforcements from arriving.

    • Sweep and Mop Thoroughly: Pay close attention to the edges along walls, corners, and the areas under appliances like the stove and refrigerator, where crumbs love to hide.

    • Manage Your Trash: Take out the kitchen trash daily. Make sure the can has a tight-fitting lid and wash the can itself regularly with a disinfectant to eliminate sticky residues and odors.

    • Secure Pet Food: Clean your pet’s food and water bowls daily. Don’t leave food out; sweep up any kibble that spills onto the floor immediately after your pet finishes eating.

    Airtight Food Storage Solutions

    A deep clean is crucial, but its effects won’t last if your pantry remains an all-you-can-eat buffet. Long-term ant control is non-negotiable and requires upgrading your food storage. Cardboard boxes and thin plastic bags offer zero protection against a determined ant scout.

    • Invest in Airtight Containers: Transfer pantry staples like sugar, flour, cereal, pasta, and cookies into sealed glass or plastic containers. This creates an impenetrable barrier.

    • Wipe Down Sticky Jars: After each use, wipe down the outside of containers for honey, syrup, jam, and other sticky condiments. A tiny, unnoticed drip is a feast for an entire ant column.

    • Leave No Food Out: Never leave food, especially sweets, greasy leftovers, or ripe fruit, sitting out on the counter. Store leftovers in the refrigerator promptly.

    Section 3: Use Ant Baits for Total Colony Eradication

    While reaching for a repellent spray offers instant gratification, it’s a short-sighted tactic. Sprays only kill the worker ants you see, leaving the queen and the rest of the colony untouched and ready to send out more foragers. For a definitive solution to how to get rid of ants in the kitchen, you must target the source. This is where ant baits prove their superiority, offering a strategic approach to eliminate the entire nest from the inside out.

    How Ant Baits Work

    Ant baits are the ultimate Trojan horse. They contain a slow-acting insecticide mixed with a sweet substance that ants find irresistible. Worker ants consume this "food" and, because it doesn’t kill them immediately, they successfully carry it back to the nest. There, they share it with the other ants, larvae, and most importantly, the queen. This process, known as trophallaxis, ensures the poison spreads throughout the entire colony. Don’t be alarmed if you see more ants at first; this means the bait is working effectively.

    Strategic Bait Placement

    Proper placement is crucial for success and safety. You must place baits directly in the path of foraging ants without making them accessible to unintended targets. For the most effective eradication, place baits in areas where you’ve observed ant activity.

    • Along baseboards and in the corners of cabinets.

    • Under the kitchen sink, especially near plumbing lines.

    • Behind or under major appliances like the refrigerator, dishwasher, or microwave.

    • Near potential entry points like windowsills, door frames, or cracks in the wall.

    Crucial Safety Note: Always place baits in locations inaccessible to children and pets. While effective, store-bought solutions still pose a risk if ingested. For a guaranteed and worry-free approach, our professional pest control services use targeted, family-safe methods to eliminate pests without compromising your family’s well-being.

    Step 4: Seal Entry Points and Create a Barrier

    You’ve eliminated the visible ants and removed their scent trails. Now for the most critical phase: fortifying your kitchen. Simply killing the ants you see is a temporary fix; preventing new platoons from marching in is the key to long-term victory. This proactive step is what truly separates a recurring nuisance from a permanent solution.

    A successful defense strategy requires a comprehensive inspection of your kitchen’s interior and exterior. Ants are masters of exploitation, capable of squeezing through the tiniest of cracks. Your mission is to find and seal these vulnerabilities. Fortunately, this doesn’t require a major renovation-simple materials like caulk and weatherstripping are your most powerful weapons in creating an impenetrable barrier.

    Interior Sealing Checklist

    Your first line of defense starts inside. Grab a flashlight and a tube of sealant to meticulously inspect and secure your kitchen. Focus your efforts on these common weak points:

    • Cracks and Gaps: Use a quality caulk to seal any cracks around window frames, door frames, baseboards, and along the back of your countertops where they meet the wall.

    • Utility Lines: Check for gaps around pipes and wiring that enter your kitchen, especially under the sink. Seal these openings with caulk or expanding foam.

    • Screens: A torn window or door screen is an open invitation for pests. Repair or replace any damaged screens immediately to maintain your home’s shield.

    Exterior Barrier Tactics

    An ant army can’t breach your kitchen if it can’t reach the walls. Taking the fight outside is a non-negotiable part of learning how to get rid of ants in the kitchen for good. Here’s how to create a formidable exterior defense:

    • Foundation: Carefully inspect your home’s foundation for any cracks or holes, particularly near the kitchen area. Seal them with an appropriate exterior-grade sealant.

    • Doors and Windows: Ensure all exterior doors and windows have tight-fitting weatherstripping. If you can see daylight around a closed door, ants can get through.

    • Vegetation: Trim back any tree branches, shrubs, or vines that are touching your house. These act as natural bridges, giving ants easy access to your siding and windows.

    While these DIY methods are highly effective, a professional inspection can uncover hidden entry points you might miss. For comprehensive, guaranteed pest protection that safeguards your home, the certified technicians at Mosquito Assassin are ready to help.

    When to Call a Professional: Signs Your Ant Problem is Out of Control

    While DIY sprays and bait traps can handle a few stray ants, a persistent infestation requires a professional strategy. Ignoring a serious ant problem won’t make it go away; it can lead to contaminated food, frustrated family members, and in some cases, significant property damage. When you’ve exhausted your options for how to get rid of ants in the kitchen, it’s time to call for reinforcements.

    A professional pest control technician does more than just spray. We have access to specialized, more effective treatments that aren’t available to the public. More importantly, we can identify the root cause of the invasion, locate the colony’s source, and implement a targeted plan that guarantees complete elimination.

    Red Flags That Demand an Expert

    If you notice any of the following signs, your ant problem has likely escalated beyond a simple DIY fix. Don’t wait for the situation to worsen-these are clear indicators that you need professional help immediately.

    • You see large ants (1/4" to 1/2"). These could be Carpenter Ants, which don’t just steal food-they tunnel through and destroy wood, potentially compromising your home’s structural integrity.

    • Ants reappear consistently. If you win the battle one day only to see them marching back the next, it means you’re only eliminating foragers, not the nest itself.

    • You find multiple nests inside. Discovering ant nests in wall voids, under floors, or in insulation means the colony is well-established within your home.

    • The infestation is widespread. Seeing ants in the kitchen was bad enough, but now they’re in the bathroom, bedrooms, or basement. This signals a massive infestation that requires a comprehensive approach.

    The Mosquito Assassin Advantage

    When you’re facing a stubborn ant invasion in the Erie, PA area, you need a local expert you can trust. At Mosquito Assassin, we provide definitive solutions, not temporary fixes. Our certified technicians are trained to correctly identify the specific ant species plaguing your home, which is the critical first step to effective eradication. We then deploy a customized treatment plan using family-safe products and an Integrated Pest Management (IPM) approach to safeguard your home and loved ones.

    As a local company, we have firsthand knowledge of the pest pressures unique to our community. We stand behind our work with a 100% satisfaction guarantee because our mission is to restore your peace of mind. Learn more about our company and our commitment to dependable results. When you’re ready to eliminate ants for good, contact Mosquito Assassin and let us take back your kitchen.

    Reclaim Your Kitchen with Confidence

    Knowing how to get rid of ants in the kitchen is about more than just spraying a single trail; it’s about a comprehensive strategy. By diligently identifying the source, eliminating their food and water supplies through sanitation, and sealing every potential entry point, you are taking powerful, proactive steps. This integrated approach is your first and best line of defense against these persistent invaders, disrupting their ability to thrive in your home.

    However, some infestations are too widespread or stubborn for DIY methods alone. When you need to guarantee their complete eradication, it’s time to call in the professionals. As your locally owned and operated experts in PA & OH, Mosquito Assassin brings Five-Star Rated service directly to your door. We don’t just treat the problem; we eliminate it with our proven, family-safe methods, giving you a definitive solution to your ant problem.

    Trust our Pest-Free Guarantee: If pests return, so do we. Tired of battling ants? Schedule your professional inspection with Mosquito Assassin today! Reclaim your space and enjoy the peace of mind that comes with a truly pest-free home.

    Frequently Asked Questions About Kitchen Ants

    Why do I have ants in my kitchen if it’s always clean?

    This is a common frustration for homeowners. Even a spotless kitchen can have tiny, unseen crumbs or a single drop of a sugary liquid that attracts scout ants. Once a scout finds a food or water source, it leaves a pheromone trail for the rest of the colony to follow. Ants can also be seeking shelter from weather changes, and your clean kitchen provides a perfect, climate-controlled environment for them to invade and explore.

    Are liquid ant baits safe to use around my pets and children?

    When used according to professional guidelines, liquid ant baits are designed for maximum safety. The active ingredient is used in very small, targeted quantities and is enclosed within a durable, tamper-resistant plastic station. This design minimizes the risk of exposure to children and pets. For complete peace of mind, our certified technicians strategically place these baits in areas that are inaccessible to your family members, ensuring effective treatment without compromising their safety.

    How long does it take for ant baits to work?

    Patience is key for effective ant eradication. You may see an increase in ant activity for the first few days as they swarm the bait-this is a sign it’s working. The worker ants carry the slow-acting bait back to the nest, eliminating the entire colony, including the queen. Depending on the size and type of ant infestation, this process typically takes anywhere from a few days to two weeks to achieve complete control and see a significant reduction in activity.

    What is the difference between an ant repellent and an ant bait?

    An ant repellent, typically a spray, kills ants on contact and creates a temporary chemical barrier. However, it only affects the ants you see and can cause the colony to split into multiple new colonies-a problem called "budding." An ant bait is a far more effective, long-term solution. It uses a slow-acting poison mixed with an attractant, which ants carry back to the nest, eliminating the problem at its source for complete colony eradication.

    Can ants come up through the kitchen sink drain?

    Yes, kitchen sink drains are a common and often overlooked entry point for ants. The pipes contain moisture and tiny food particles that become trapped in the p-trap, creating an ideal environment for ants to thrive. They can travel through the plumbing from outside or from other areas of the building, using the drain as a hidden highway directly into your kitchen. Regular drain cleaning can help make this route less attractive to these invasive pests.

    What’s the best way to get rid of ants permanently?

    The most effective strategy for how to get rid of ants in the kitchen permanently involves a comprehensive, multi-step approach. This includes not only using targeted, professional-grade baits to eliminate the entire colony but also identifying and sealing all potential entry points around your home’s foundation, windows, and utility lines. A customized treatment plan from a licensed pest control professional is the most reliable way to ensure complete and lasting eradication of the infestation.

  • Cleaning After a Rodent Infestation: A Complete Safety Guide

    Cleaning After a Rodent Infestation: A Complete Safety Guide

    The scratching in the walls has finally stopped and the pests are gone. But as you survey the scene they left behind, the droppings, the shredded materials, the lingering odor, a new sense of unease can set in. You’re not just disgusted by the mess; you’re worried about the hidden dangers. The task of cleaning after a rodent infestation can feel overwhelming, with the threat of Hantavirus and other diseases turning a simple cleanup into a high-stakes operation. Where do you even begin?

    We’re here to eliminate the uncertainty and restore your peace of mind. This comprehensive guide provides the professional, step-by-step method you need to safely and effectively disinfect your home. We’ll walk you through the proven techniques to safeguard your family’s health, eradicate lingering odors, and reclaim your space with confidence. Consider this your actionable checklist for a completely sanitized home, from choosing the right protective gear to knowing when it’s time to call in the professionals.

    Safety First: Essential Prep and Gear for Rodent Cleanup

    Once rodents have been eliminated from your home, the job is only half done. The most critical phase, cleaning after rodent infestation, requires a professional approach to safeguard your family’s health. The visible mess of droppings and nesting materials is unpleasant, but the real threat lies in the invisible pathogens they leave behind. Rodent urine and feces can carry a host of bacteria and viruses that pose significant health risks.

    One of the most severe dangers is Hantavirus, a pathogen spread primarily by deer mice. Disturbing dried droppings, urine, or nesting materials can release microscopic virus particles into the air. If inhaled, these particles can cause Hantavirus Pulmonary Syndrome (HPS), a serious and potentially fatal respiratory disease. This is why proper procedure is not just recommended-it’s essential for your safety.

    To better understand the core safety protocols, this video provides a helpful overview:

    Before you even touch a paper towel, follow these two foundational rules. First, NEVER sweep or vacuum dry droppings. This is the fastest way to aerosolize dangerous viruses, making them breathable. Second, thoroughly ventilate the contaminated area by opening windows and doors for at least 30 minutes before you begin working. This helps disperse any airborne particles.

    Assembling Your Personal Protective Equipment (PPE)

    Protecting yourself is the top priority. Do not attempt a cleanup without the proper gear. Your essential PPE checklist includes:

    • Non-absorbent gloves: Rubber, latex, or nitrile gloves are mandatory to prevent direct contact with contaminants.

    • N95-rated respirator: A standard dust mask is not enough. An N95 mask is designed to filter out the fine airborne particles that can carry viruses.

    • Goggles: Protect your eyes from splashes of cleaning solution or contaminated liquids.

    • Disposable coveralls: For heavy infestations, especially in confined spaces like attics or crawlspaces, coveralls protect your clothing and skin.

    Choosing the Right Disinfectant Solution

    You need a powerful solution to neutralize the pathogens left behind. Gather your supplies before you enter the area to ensure an efficient and safe process. You will need:

    • A virucidal disinfectant: You can use a commercial product rated to kill viruses or a simple DIY bleach solution. To make your own, mix 1 part household bleach to 9 parts water.

    • Critical Safety Note: Never mix bleach with ammonia or any other cleaning product, as this can create toxic chlorine gas.

    • Supplies: A spray bottle for the disinfectant, paper towels for wiping, and heavy-duty, sealable trash bags for disposal.

    The Professional 5-Step Process for Cleaning Rodent Droppings

    Once you’ve addressed the source of the infestation, the next critical phase is the cleanup. Simply sweeping or vacuuming is dangerous, as it can send hazardous dust airborne. A methodical, professional approach is essential for safeguarding your home and family from lingering pathogens. This proven 5-step process for cleaning after rodent infestation ensures you eliminate all waste without cross-contamination, neutralizing the serious rodent-borne disease risks that droppings and urine leave behind.

    For best results on hard surfaces like floors, counters, and shelves, always work from the top down and from the cleanest areas toward the most heavily contaminated spots. Patience is your most important tool; allow the disinfectant to do its job completely.

    Step 1: Soak and Saturate the Contaminated Area

    With your personal protective equipment (PPE) securely on, thoroughly spray the visible droppings, urine stains, and nesting materials with your disinfectant or bleach solution. Do not be shy with the spray, the goal is to completely saturate the waste. Let the solution soak for a minimum of 5 to 10 minutes. This crucial waiting period kills viruses and bacteria before you ever touch the waste, drastically reducing the risk of exposure.

    Step 2: Wipe Up and Remove the Waste

    After the disinfectant has had time to work, use disposable paper towels to wipe up the soaked droppings and urine. Pick up the waste carefully and place the used paper towels directly into a heavy-duty trash bag. Never use a reusable cloth, sponge, or mop for this step, as it creates a high risk of spreading contamination throughout your home.

    Step 3: Securely Dispose of All Contaminated Materials

    Once you have removed all the physical waste from the area, seal the trash bag tightly. To prevent any potential leaks or tears, immediately place this sealed bag inside a second trash bag and seal that one as well. Dispose of the double-bagged waste in a secure, outdoor trash receptacle with a tight-fitting lid to prevent other pests from accessing it.

    Step 4: Disinfect the Entire Area Again

    With the physical contaminants gone, it’s time to disinfect the entire area to eliminate any remaining microscopic threats. Mop the floors and use a clean cloth or paper towels to wipe down all surfaces the rodents may have touched, including countertops, shelves, cabinet interiors, and even walls. Pay special attention to corners, baseboards, and known rodent pathways.

    Step 5: Final Cleanup and Ventilation

    Your job isn’t done until your tools and yourself are also clean. Thoroughly disinfect your mop and any other reusable cleaning tools. Remove the clothes you wore and wash them immediately in hot water. Finally, wash your hands thoroughly with soap and water. Open windows and doors to ventilate the area for at least 30 minutes to air out any lingering disinfectant fumes and ensure fresh, clean air circulates through the space.

    How to Clean Contaminated Items and Difficult Spaces

    Rodents don’t just travel across floors; they burrow into furniture, nest in fabrics, and contaminate hidden spaces like attics and crawlspaces. A crucial part of cleaning after rodent infestation involves tackling these difficult areas where pathogens can linger. Before you begin, always assess the level of contamination. While many items can be salvaged with the right techniques, heavily soiled materials, especially insulation, often pose a significant health risk and must be discarded.

    Clothing, Bedding, and Other Washable Fabrics

    Items like clothing, towels, and bedding that have been exposed to rodents require immediate and thorough washing to eliminate bacteria. Follow these proven steps for safe and effective cleaning:

    • Transport Carefully: Place items in a plastic bag to carry them to the washing machine, minimizing the spread of contaminants through your home.

    • Wash on High Heat: Use a standard laundry detergent and wash the items in the hottest water the fabric can safely tolerate.

    • Dry Thoroughly: Tumble dry on a high heat setting, as the sustained heat helps kill any remaining pathogens.

    • Use Sunlight for Non-Washables: For delicate items that cannot be washed, leaving them in direct sunlight for several hours can help disinfect them, as UV light has natural germicidal properties.

    Carpets and Upholstered Furniture

    Soft surfaces like carpets and furniture can harbor unseen bacteria and viruses from rodent urine and droppings. After vacuuming up all visible debris (using a vacuum with a HEPA filter), you must deep clean and disinfect. For carpets, use a steam cleaner with a commercial-grade disinfecting shampoo. For sofas and chairs, apply a disinfectant spray specifically designed for upholstery. Always test any cleaner on a small, hidden area first to ensure it doesn’t cause discoloration or damage.

    Attics, Crawlspaces, and Contaminated Insulation

    These areas represent the highest risk during cleanup. Insulation, once contaminated by rodent nests, urine, and feces, cannot be effectively sanitized. The material is porous, trapping dangerous pathogens that can easily become airborne if disturbed. Attempting to remove it without proper personal protective equipment (PPE) and specialized tools is extremely hazardous.

    Professionals use commercial-grade HEPA vacuums and follow strict protocols to safely remove and dispose of soiled insulation. Given the serious health risks, this part of cleaning after rodent infestation is best left to certified experts. For severe attic or crawlspace infestations, contact a professional for safe removal and sanitation to ensure your home is truly clean and your family is protected.

    Eliminating Lingering Odors and Stains After Cleanup

    You’ve disinfected surfaces and removed all visible signs of rodents, but a persistent, musty smell remains. This unpleasant odor is a common problem after an infestation, typically caused by urine that has soaked deep into porous materials like wood, drywall, insulation, or concrete. Simply masking the smell with air fresheners is a temporary fix that won’t solve the underlying issue. Proper odor elimination is the final, essential step to fully reclaim your home and restore its clean, safe environment.

    Pinpointing the Odor’s Source

    To eliminate the smell, you must first find its source. The odor will be strongest near former nesting areas, runways, or hidden urine spots. Thoroughly inspect dark, undisturbed areas like wall voids, crawl spaces, attics, and beneath floorboards. For a professional approach, use a UV blacklight in a darkened room; rodent urine will glow, revealing hidden stains on carpets, baseboards, and other surfaces that are invisible to the naked eye.

    Eradicate Odors with Enzymatic Cleaners

    Standard household cleaners won’t break down the uric acid crystals in rodent urine, which are the root cause of the lingering smell. For complete odor eradication, you need an enzyme-based (or enzymatic) cleaner. These powerful solutions use beneficial bacteria to produce enzymes that break down the organic proteins in urine, feces, and other biological matter, permanently destroying the source of the odor. This step is a non-negotiable part of a comprehensive cleaning after rodent infestation. Always follow the product’s instructions for safe and effective use on different materials.

    Natural Methods for a Final Refresh

    After treating the source, you can use natural solutions to absorb any remaining airborne odors and freshen the space. These methods are safe, effective, and work best in conjunction with deep cleaning.

    • Baking Soda: Place open boxes or shallow bowls of baking soda in affected rooms to absorb odors from the air.

    • White Vinegar: Set out bowls of white vinegar for a day or two. Vinegar is excellent at neutralizing stubborn smells.

    • Ventilation: Open windows and use fans to circulate fresh air throughout the space, helping to air out any final traces of the infestation.

    Successfully completing the cleaning after rodent infestation is a major accomplishment. However, if odors persist or the contamination was widespread, professional intervention may be necessary to guarantee your home is fully restored. For comprehensive pest eradication and sanitation support, trust the experts at Mosquito Assassin to safeguard your home and family.

    When DIY Isn’t Enough: Signs You Need a Professional

    While the steps outlined in this guide are effective for minor incidents, a large-scale or long-term rodent problem poses significant health risks that demand professional intervention. Attempting a major cleanup without the right training or equipment can expose your family to dangerous airborne pathogens. Knowing when to call for expert help is the most important step in safeguarding your home and health.

    Indicators of a Heavy Infestation

    If you notice any of the following signs, the problem has likely grown beyond a simple DIY project. These are clear signals that you need professional assistance for a safe and thorough cleanup:

    • Widespread Droppings: You find droppings and urine stains in multiple rooms, across different floors, or inside cabinets and pantries.

    • Visible Pathways: Dark, greasy rub marks are visible along walls, baseboards, and pipes where rodents have traveled repeatedly.

    • Overwhelming Odor: A strong, musty smell of ammonia from urine is noticeable throughout the home and doesn’t fade with ventilation.

    • HVAC Contamination: You suspect or have found evidence of rodents nesting or leaving waste inside your air ducts or HVAC system.

    The Mosquito Assassin Advantage: Cleanup and Exclusion

    When facing a severe rodent problem, you need a comprehensive solution, not just a surface-level clean. A professional service for cleaning after rodent infestation is designed to eliminate the threat completely and protect your family. Our certified technicians arrive with commercial-grade Personal Protective Equipment (PPE), HEPA-filtered vacuums, and EPA-approved virucidal disinfectants to neutralize pathogens safely.

    We don’t just clean; we restore your peace of mind. Our team is trained to safely remove and dispose of contaminated materials, such as soiled insulation in your attic or crawlspace. But our work isn’t finished until we complete the most critical step: exclusion. We conduct a thorough inspection to identify and professionally seal every potential entry point, from foundation cracks to roofline gaps. This proven process ensures that once we handle the cleanup, rodents can’t get back in to start the cycle all over again.

    Don’t risk your health on a hazardous cleanup. Contact the experts at Mosquito Assassin for a dependable and complete solution.

    Reclaim Your Home with Professional Rodent Cleanup

    Tackling the aftermath of a rodent infestation is a serious task that demands caution and the right approach. As we’ve covered, the key takeaways are clear: always prioritize your safety with proper protective gear, follow a meticulous disinfection process to eliminate dangerous pathogens, and understand when a situation is too hazardous for a DIY approach. A thorough cleaning after rodent infestation is not just about appearances, it’s about fundamentally safeguarding the health of everyone in your home. These steps are critical for restoring a safe living environment.

    When the risks are high and the job is extensive, the safest choice is to call in the professionals. At Mosquito Assassin, we provide the expertise and equipment to handle the job correctly and safely. As a Locally Owned and Operated team serving communities across PA & OH, we are dedicated to protecting our neighbors with Family-Safe Treatments and a rock-solid Pest-Free Guarantee. Don’t leave your family’s well-being to chance. Schedule a professional rodent cleanup and exclusion service today!

    Frequently Asked Questions About Cleaning After Rodents

    What are the health risks of cleaning up rodent droppings myself?

    Rodent droppings and urine can transmit dangerous diseases like Hantavirus, Salmonella, and Leptospirosis. The primary risk is inhaling airborne virus particles that get stirred up by improper cleaning methods like sweeping or vacuuming. Direct contact with contaminated surfaces can also lead to infection. Safeguarding your family’s health is the top priority, which is why professional cleaning after rodent infestation is the most reliable way to eliminate these serious threats and ensure the job is done safely.

    I already vacuumed up the droppings. What should I do now?

    Using a standard vacuum can aerosolize dangerous virus particles, spreading them throughout the air. If you’ve already done this, take the vacuum outside immediately. While wearing gloves and a respiratory mask, carefully remove the bag or empty the canister into a sealed plastic bag for disposal. Thoroughly disinfect the entire vacuum cleaner with a bleach solution or an EPA-registered disinfectant. Monitor the area for any missed contamination and be aware of any flu-like symptoms in the coming weeks.

    How can I tell if the rodents are completely gone before I start cleaning?

    Before beginning any cleanup, you must confirm the infestation has been eliminated. Look for the absence of fresh signs for several days, such as new droppings (which are dark and soft), recent gnaw marks, or tracks in dusty corners. A proven method is to clean a small, visible area and check it daily. If no new rodent activity appears after three to five days, it is a strong indicator that they are gone and you can proceed with a full cleaning.

    Is bleach the only thing that will kill the germs in mouse droppings?

    While a 1:10 bleach-to-water solution is highly effective and recommended by the CDC, it is not your only option. Any commercial, EPA-registered disinfectant that is rated to kill viruses will also work effectively. The critical step is to follow the product’s directions for contact time, the contaminated surface must remain wet with the disinfectant for the specified period to ensure all harmful pathogens are neutralized. This guarantees a truly sanitized and safe environment for your family.

    How long do viruses like Hantavirus survive in the environment?

    The survival time for Hantavirus depends on environmental conditions. In dried rodent urine, droppings, or saliva, the virus can remain infectious for two to three days at normal room temperature. Its lifespan can be longer in cool, dark, and undisturbed areas like basements or crawlspaces. Direct sunlight and UV exposure help deactivate the virus more quickly, but you should always assume that any droppings you find could still be infectious and take proper precautions.

    Can the smell of dead rodents in walls be removed professionally?

    Yes, absolutely. A lingering odor from a dead rodent is a difficult problem that requires a professional solution for complete eradication. Our certified technicians have the tools and expertise to locate and remove the carcass, even from inaccessible areas like wall voids or attics. We then use commercial-grade deodorizers and fogging treatments to neutralize the odor at its source, permanently eliminating the smell and restoring fresh air to your home.